How I (mostly) built an online multiplayer game and what I learned from it

Hello fellow nerds. It's been a while since my last blog post but this one should certainly be interesting. I've been busy with school at some point and got writer's block but now I'm back! In this blog post, let's do something different and discuss with you one of the projects which I've been working on recently. This project is something I'm fairly proud of which I started back in May of last year. It's called Commission, a multiplayer online party game. Aside from the technical details of how I built it, I'll also go over the higher-level lessons I've learned from building such a large project. Even if you aren't familiar with this tech stack or this is too advanced for you, perhaps you can learn what technologies are out there or some general coding tips!
For you beginners out there reading this, I hope that this guide will give you a good idea of what's possible if you just hang in there on your journey to learning to code. Trust me, while learning can be daunting at first and hearing of a big application like this can be overwhelming, if you stick to the process you can do even bigger things.
Please note that there is still some work for me to do on this project as it is not 100% complete at the time of writing this. However, the project is almost completely done in terms of UI and functionality and mostly just needs some bug fixing, testing, and code clean-up.
What does this app do?
Commission is a multiplayer online party game for mobile and web platforms (although it has been primarily designed for mobile). In the game, during each round, each player has a turn to be a judge. As a judge, the player chooses something for the rest of the players in the game to draw for them. The judge chooses the player with the best drawing to award with 500 dollars (points in the game) at the end of the match. The caveat here is that players are allowed to draw on another players' canvas for a money penalty depending on the brush size.
What do you need to know to build something like this?
Before we begin, I thought I'd share the basic technologies you'd have to understand to build this yourself and in some cases, to fully understand what I'm talking about. These include:
Don't worry if you don't understand any of these technologies because you can still get a taste here of why there are important and have a reason to learn them. Additionally, I'll give some more general lessons I've learned here that could help you as a programmer in general. As for the tech stack...
What frameworks did I use to build the app and why?
Frontend
For the frontend, I've used Ionic and Angular to create the cross-platform web-mobile environment. A part of the reason I chose this was because I was interested in learning Ionic and wanted a chance to play around with it. In case you don't know, Ionic is a framework that allows you to create cross-platform web-mobile apps using Javascript frameworks. It's quite nice since it allows you to easily have an app for android, IOS, and web platforms while coding in the comfort of Angular, React, or Vue. It comes with native APIs that allow you to access features of the mobile hardware and a UI library to give the feel of a native application.
Backend
For the backend, I've used Spring Boot since that is my backend framework of choice. Here, I had the goal of playing around with WebSockets with Spring to create a full real-time experience between users (something I've never done before). The reason we use WebSockets here is that they allow for fast two-way communication between our frontend and backend which is necessary for a game.
As for a database, I opted out of using it for this application. You'll see why and how later on.
Project architecture
This project has a lot of moving pieces around it to make this complex application possible. I'll try to break things up so you guys have a better understanding of how all this is possible.
Authentication (or lack thereof)
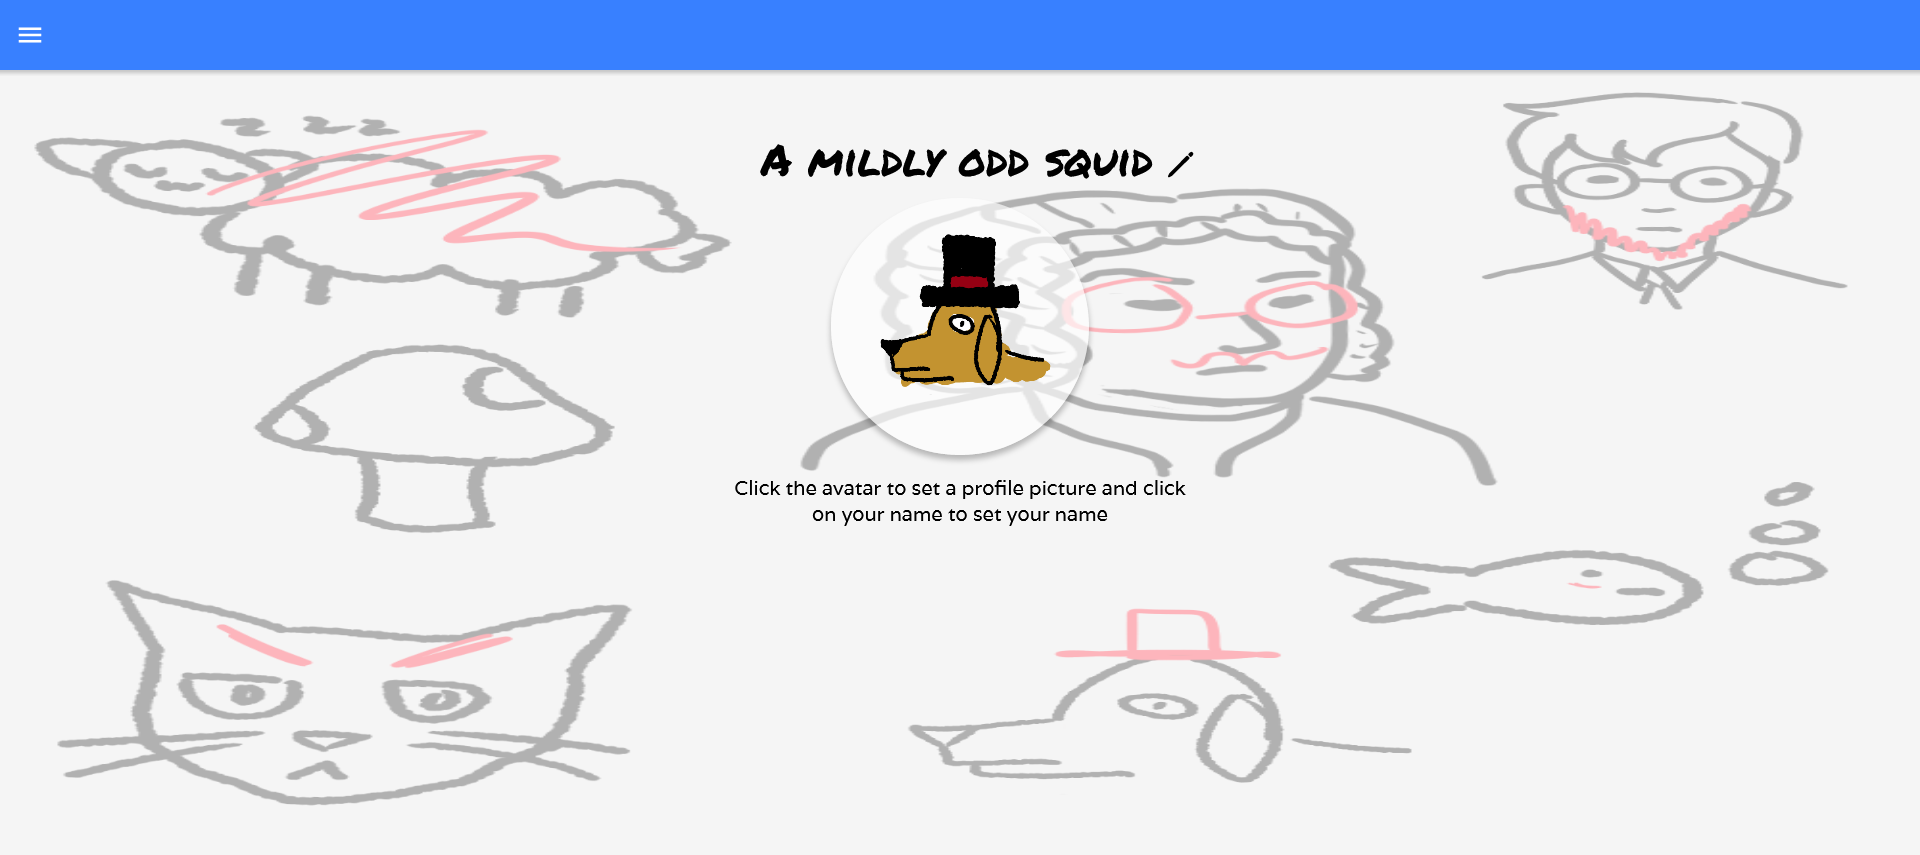
For authentication, the users are anonymous so no login or signup is required. The reason I decided on this was that I wanted the game to be more accessible to play without users having the nuisance of making an account when it wasn't needed here. Additionally, I thought that if I had plans of seriously deploying this game to Google Play, I wouldn't want the overhead of needing a database. As such, I cut out features that would require user accounts (which I thought users wouldn't think highly of anyways) such as being able to save drawings from previous games.
Even though there are no user accounts, users have to create a quick profile of how they will appear in-game. This is as simple as a username and some pre-made profile pictures for them to select from:
Creating a game
As for the game creation, I added a lobbying system. Here, the client sends a POST request to register a new game lobby. In the POST request, the client sends a request body containing info about the selected game settings. These include the number of players, the number of rounds, and how many seconds each match lasts.
In the game one match is one drawing session, and one round corresponds to each player getting a turn to be the judge.
With that, the server will send back a game code that the host of the game can send for others to join.
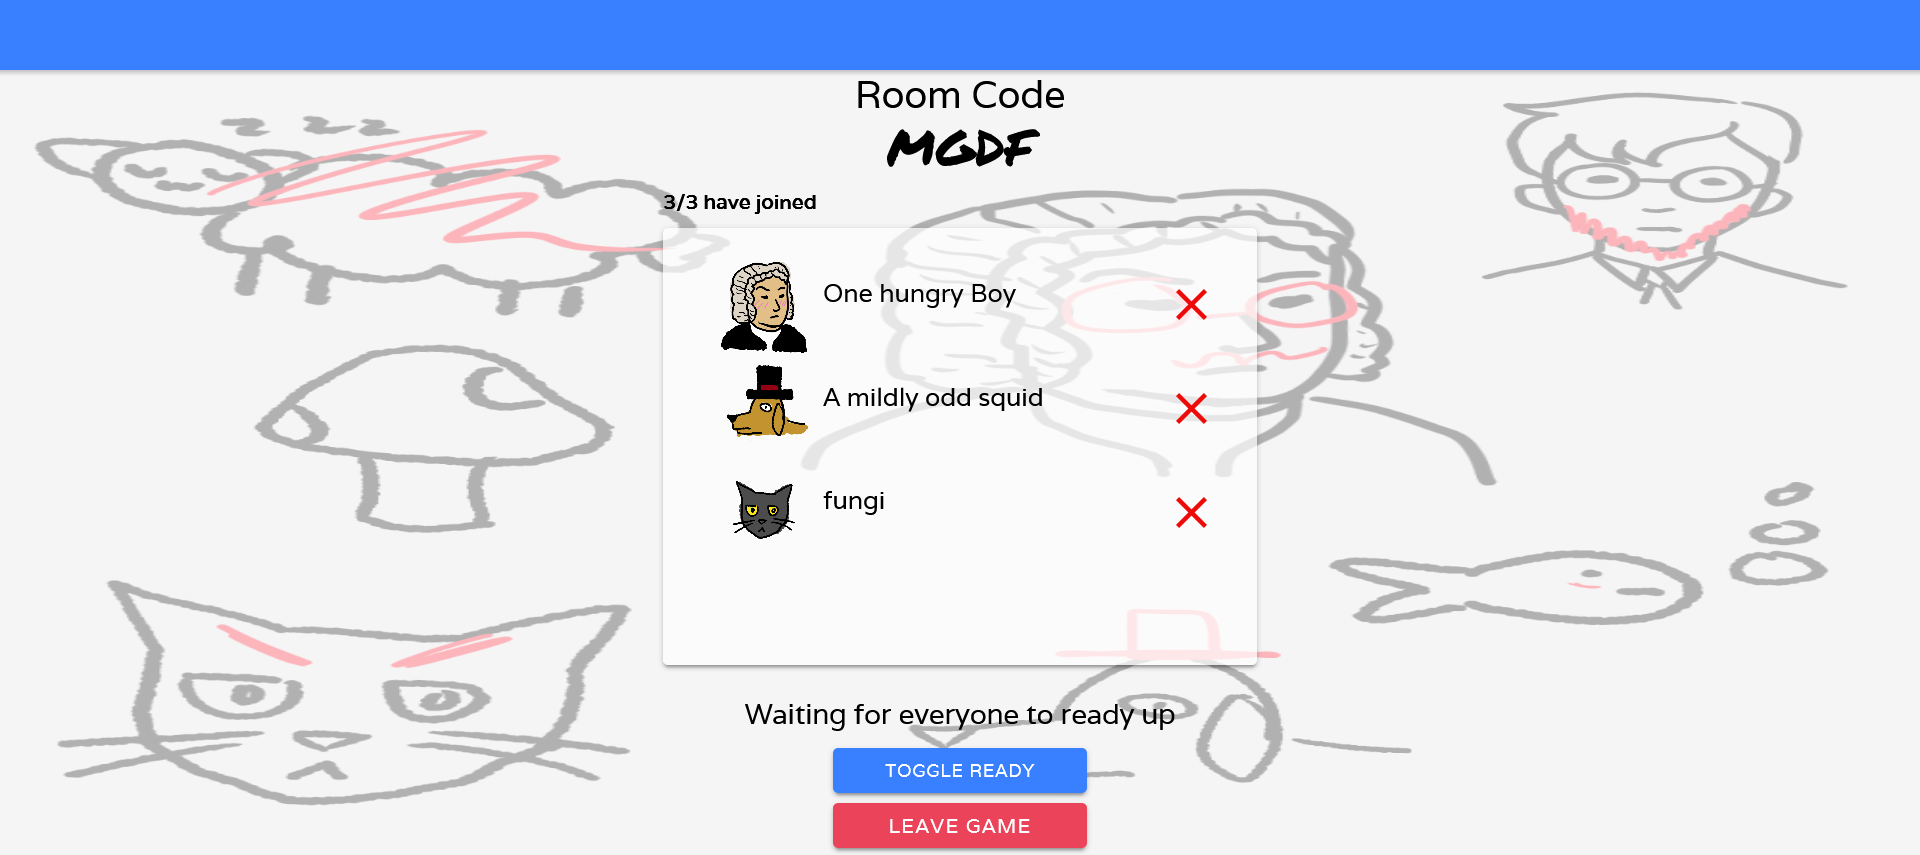
Game lobby
In the game lobby, there's a list of all the users who have joined with their names and profile pictures. Additionally, each player can set a ready status (ready or not ready). If not all the players are ready, then the host cannot start the game. Otherwise, a button will appear on the host's screen to start the game. Each player can send a message via WebSocket to the server to signal a change in ready status. However, only the host can send a message to the server to start the game. The way this works is that each user will send a receive a JWT from the server to verify who is who. With that, each user will send the token along with any messages they send via WebSocket.
Below is a picture of what a lobby would look like:
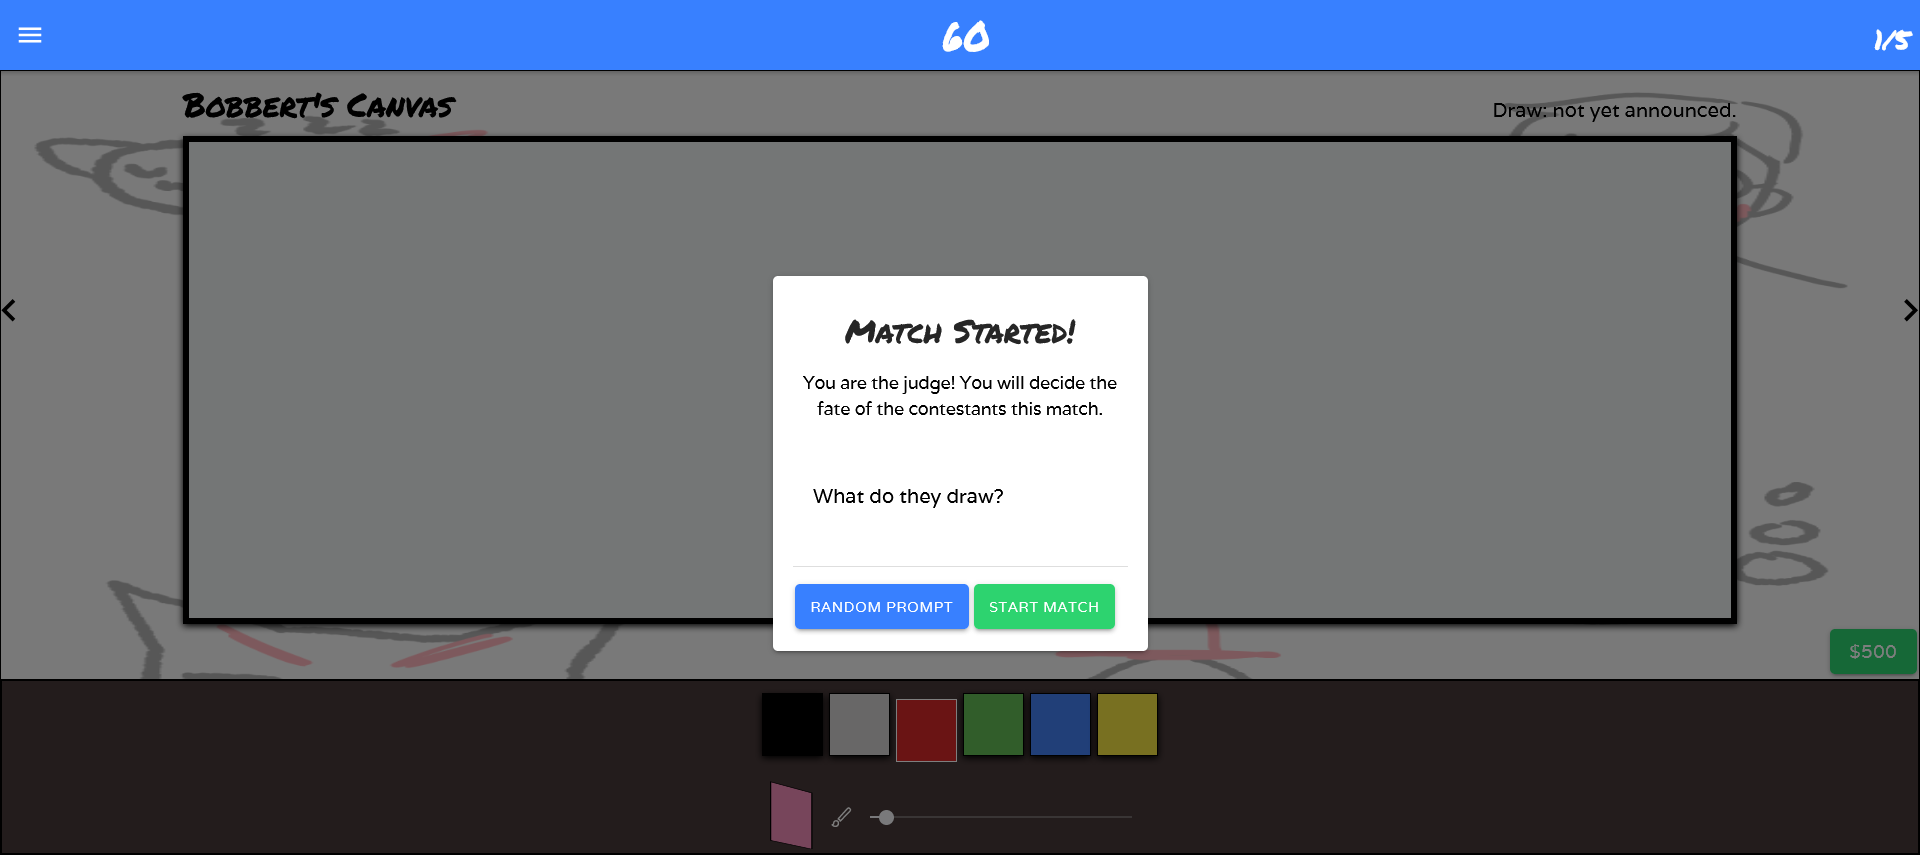
Playing the game
When in the game, the server selects a random player to be the judge. The judge writes a prompt and sends it to the server to be passed along to the other players via WebSocket. If the judge takes too long, the server will generate a random prompt to use for the next match. Once each user receives this message, their timers start and they can begin drawing. At this point, the server will schedule a separate thread to send a message to the players when they run out of time. Spring Boot provides a nice way to schedule tasks for a thread to perform after a certain amount of time which is what I used here.
Below is a picture of what the judge's prompt selection screen looks like:
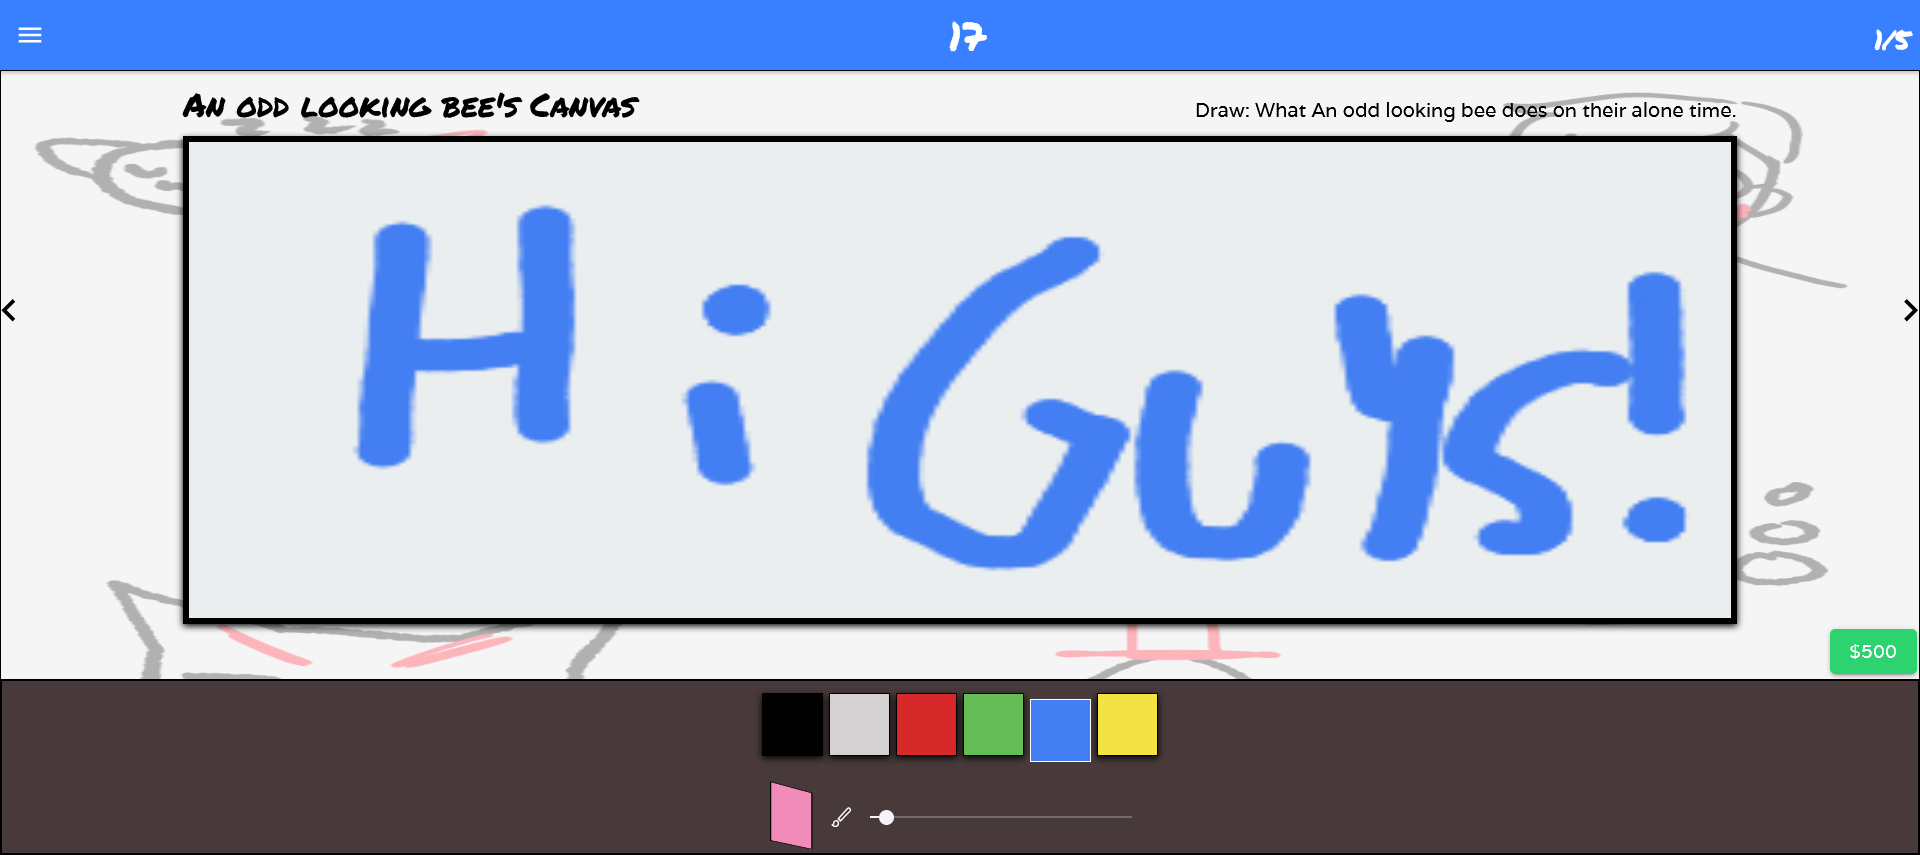
During the drawing period, each player gets a canvas to draw on and can toggle between viewing different players' canvases. Here, every time a player draws with their mouse or touch, they send a message to the server. This message contains info such as where the user started the stroke, where the stroke ended, the color used, and which canvas they drew on. This information is then sent back to each user so they can have each other's canvases synced on the screen. Additionally, the server uses this info to apply the appropriate penalty for drawing on someone else's canvas.
After a match has ended, the server sends back a message to inform the users that their time is up. From there, the server and other users wait some time for the judge to select what they think is the best drawing. If the judge takes too long, a random winner will be selected. During the next round, the judge is chosen based on their placement in an array in my backend. The backend simply goes through the array in order from the first randomly selected judge ensuring that everyone has a turn being the judge.
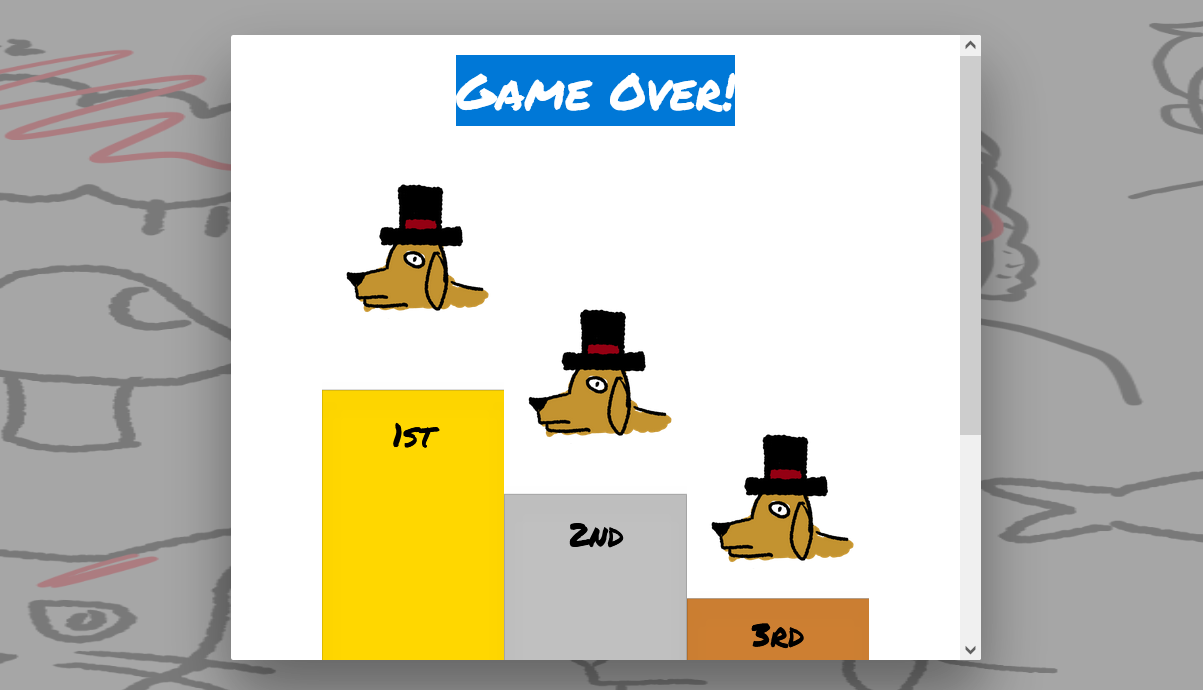
Finally, after all the matches and rounds are done with, a fun little game over screen is displayed with some music:
Challenges I've faced and what I've learned from them
I would be lying to you if I told you this was a simple task. I've never built something to this scale before with all the above technologies combined. As you can imagine, there certainly were some difficulties along the way.
On planning before you code
To start, perhaps the biggest lesson I could learn from this experience was that I need to plan more before I code. Many of us, including myself, can get excited and want to dive headfirst into a project especially something like this which I was excited to work on. This is exactly what happened to me at some points when building this project. While I did make some plans in my head before I coded, of course, they weren't detailed enough and before I knew it, I would have to redo large portions of functionality. Believe me, this isn't the first time this happened to me but I would certainly hope I learned from this so this would be the last time.
As for ways to plan out your code, there are a couple of standard ways to do so such as using UML or ER diagrams. I, however, like to plan out my code by writing ideas and pseudocode on paper but I'm sure there are other ways of doing so. Let me know if you know of any good strategies to do this in the comments below.
On writing tests for your code
Another thing that I have to learn from this project is the value of writing automated tests. With these, you can have code specifically for ensuring your application or parts of it work properly. During the development process of Commission, I sometimes found myself having to run the app, navigate through the UI, set up multiple users, enter a game, and run through portions of it to test if some recently modified code works. Doing this can take up to 5 minutes over many times testing the app after changes were made! Sure, for some cases, I've been able to add code to enter a game-like state faster, but it just goes to show how helpful writing automated tests could be here. With automated tests, you take features of your app from taking minutes to test to taking a few clicks in your IDE and some seconds to run. With that, it can easily help you prevent bugs from popping up in the future.
While I have written some tests for the project, I could have written more to save some time. A large part of this was because I had no idea of how to write tests for WebSocket interactions (and still don't but I'll work on that). However, I'm sure there is some room there for me to write more tests (particularly in the frontend) that could save me time and energy with some quick assurance against bugs. Even though writing the tests initially feels like a big time commitment, if you do the math it can make up that time in the future and then some.
Conclusion
Overall, I hope with this guide I could give you a great idea of what is possible if you commit to learning to code, especially the above technologies. You also got to see some of the thought processes I have when building large apps like this and some new concepts for you to learn in the future. Let me know in the comments below if you found this useful or if you have any questions. Also, the repo for this app can be found here. Happy coding!
If you like what you read, consider subscribing to my newsletter to be notified of new blog posts. Also, check out my programming tutorials here.